

How's your weather? Here in northern Wisconsin we just had an ice storm so everything is very icy. Driving and walking can be very tricky sooo...I wanted to make a card that was bright and cheery. The Hello Ladybug bundle jumped out at me and I knew I could use some bright cardstock despite the dreary weather outside. Enjoy this cute card and who doesn't love a bundle that comes with a punch?!?!
")


 Host Designer Series Paper")


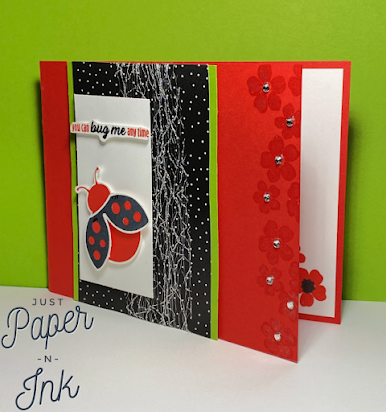
Cutting & Scoring:
• Poppy Parade 11” x 4 ¼” scored at 5 ½”
• Granny Apple Green layer 4 ¼” x 3 ¼”
• DSP 3” x 4 ¼”
• Basic White 3 ¼” x 1 ¾”, scraps for stamping
• Metallic Mesh Ribbon 5 ½”
Stamp flowers along the open side of the card front in Poppy Parade being sure to rotate the stamp. Add Wink of Stella over the flowers.
Adhere the DSP to the Granny Apple cardstock.
Wrap Metallic Mesh Ribbon around DSP and cardstock as shown and adhere to the back with scotch tape.
Add the DSP layer to the card base approx. ¾” from the left edge.
On Basic White scrap stamp: ladybug body, wings and sentiments. To get the two colors on the sentiments you can use the Stampin’ Write Markers and apply the colors to the stamp or mask off the letters you don’t want in a certain color, apply ink, remove mask and stamp. Repeat with the remaining color.
Punch out ladybug and fussy cut sentiment. Add the wings to the ladybug with dimensionals attaching both the sentiment and ladybug to the Basic White layer with more dimensionals.
Adhere to Basic White layer with dimensionals to the card.
Add Rhinestones to the flower centers.
Share card with someone special.
No comments:
Post a Comment