Join

Join
Join My Team: Demonstrators and Discount Shoppers Welcome

PLEASE LEAVE YOUR EMAIL FOR NOTIFICATION OF MY CLASSES AND TO RECEIVE ALL MY FREE TUTORIALS

Please Subscribe for Current Posts and Newsletters

* indicates required

Friday, March 25, 2022


Enjoy this "No-Stamp" card!!


Elegant Thanks
All Images © Stampin' Up!®
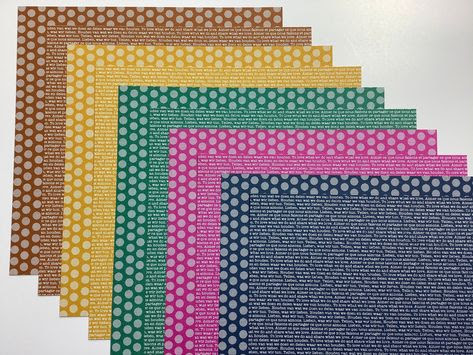
Product List

Cutting & Scoring:
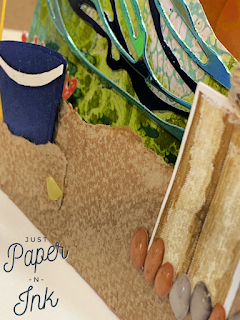
Crumb Cake-5 1/2"x8 1/2" scored at 4 1/4"
      4"x5 1/4"
      1 1/4"x3 1/2"
Basic Black-scrap approximately 1 1/4"x3 1/2"
Copper Foil-1 3/8"x3 5/8"
      1 1/2"x4"
DSP-1 3/8"x3 7/8"
Prep:
*Fold and burnish Crumb Cake base on score line.
*Emboss 4"x5 1/4" Crumb Cake piece and adhere to base.

Die Cut:

'Thanks' shadow out of larger Copper Foil piece leaving enough on borders to use as matte for DSP

Cut 'Thanks' out of Basic Black and adhere to Copper Foil shadow piece.

Assemble:

*Adhere DSP to remaining Copper Foil covering cut area.

*Adhere small Crumb Cake piece to small Copper Foil piece and adhere 'Thanks' on top.

*Adhere two rectangular pieces to card base as shown.

Thursday, March 24, 2022


New catalog means clearance sale!!!!  You can click HERE to see the complete list of retiring products from the current 2021-2022 annual catalog.  Some products are up to 50% off!!  All products are "WHILE SUPPLIES LAST" so shop soon. The 2020-2022 In-Colors will also be going away, I love these colors and will be sad to see them go.

Cinnamon Cider, Bumble Bee, Just Jade, Magenta Madness and Misty Moonlight will all be leaving us to make room for the new 2022-2024 In-Colors.  If you need more card stock, ink pads, markers or re-inker order yours soon as these tend to run out fast and once they are gone they are gone forever.  Go to my STORE to get all of your clearance supplies soon.

The new annual catalog will begin showing up in mailboxes in April if you do not currently have a Stampin' UP demonstrator I would love to earn your business.  If you would like to have a catalog mailed to you please email me at wendysuewinter@gmail.com and include your complete mailing address and I will send you a copy. 


Monday, March 21, 2022

LAST CHANCE


ORDERING DEADLINE IS TUESDAY MARCH 22, 2022

Here is a little sneak peek at some of the projects


Click Here to see ordering options!!


Tuesday, March 15, 2022

 I'm in love with the new Waves of Inspiration Suite.  I combined it with a few other stamps and dies to make this over the top WOW card!!

I tried to add texture to the sand by stamping and embossing the crumb cake cardstock.
There are also some small details like fish swimming and seagrass stamped under the waves.


Some basic shapes helped to form some kites and some interest to a pink sunset.

If you like this you will love my March Paper~N~Ink at Home.  Check out all the details 
Deadline for ordering is March 22, 2022
Click Here for ordering options


Friday, March 11, 2022


You will have tons of materials left over to continue creating!!!
Click HERE TO SEE ORDERING OPTIONS
Deadline for ordering is March 22, 2022


Monday, March 7, 2022

How's your weather?  Here in northern Wisconsin we just had an ice storm so everything is very icy.  Driving and walking can be very tricky sooo...I wanted to make a card that was bright and cheery.  The Hello Ladybug bundle jumped out at me and I knew I could use some bright cardstock despite the dreary weather outside.  Enjoy this cute card and who doesn't love a bundle that comes with a punch?!?!


Product List

Cutting & Scoring:  
Poppy Parade 11” x 4 ¼” scored at 5 ½”
Granny Apple Green layer 4 ¼” x 3 ¼”
DSP 3” x 4 ¼”
Basic White 3 ¼” x 1 ¾”, scraps for stamping
Metallic Mesh Ribbon 5 ½”

Stamp flowers along the open side of the card front in Poppy Parade being sure to rotate the stamp.  Add Wink of Stella over the flowers.

Adhere the DSP to the Granny Apple cardstock.

Wrap Metallic Mesh Ribbon around DSP and cardstock as shown and adhere to the back with scotch tape.

Add the DSP layer to the card base approx. ¾” from the left edge.

On Basic White scrap stamp: ladybug body, wings and sentiments.  To get the two colors on the sentiments you can use the Stampin’ Write Markers and apply the colors to the stamp or mask off the letters you don’t want in a certain color, apply ink, remove mask and stamp.  Repeat with the remaining color.

Punch out ladybug and fussy cut sentiment.  Add the wings to the ladybug with dimensionals attaching both the sentiment and ladybug to the Basic White layer with more dimensionals.

Adhere to Basic White layer with dimensionals to the card.
Add Rhinestones to the flower centers.

Share card with someone special.


Tuesday, March 1, 2022


This mini—but mighty—machine is durable, portable, and easy to use. It’s the perfect pick for budding beginners who want to branch out, papercrafting pros who want to craft on the go, or those who are short on storage space! With this trusty tool, any crafter can make precise cuts and embossed designs for their projects with one pass.

During the month of March, you can snag the Mini Stampin’ Cut & Emboss Machine at a 20% discount! This miniature machine is compatible with a large selection of Stampin’ Up! embossing folders and dies. Build your craft collection and combine the Mini Stampin’ Cut & Emboss Machine with any (or all!) of the select stamp-and-die bundles that are also available for 20% off during the month of March!

Click HERE  to see the complete list of stamps on sale, then click on my shopping cart to go to my store and place your order.  Order soon to avoid shipping delays and remember to use the host code if your order is under $150.00.  If the order is over $150.00 Stamping up will reward you with your own stampin rewards.